A Simple Guide to Screen Printing Your Own Shirts
Silk screen printing is a bit intimidating at first, but it's easier than it looks and it's possible to set up a printing area in your own home for cheap. We'll show you how you can do it with a minimum amount of materials.
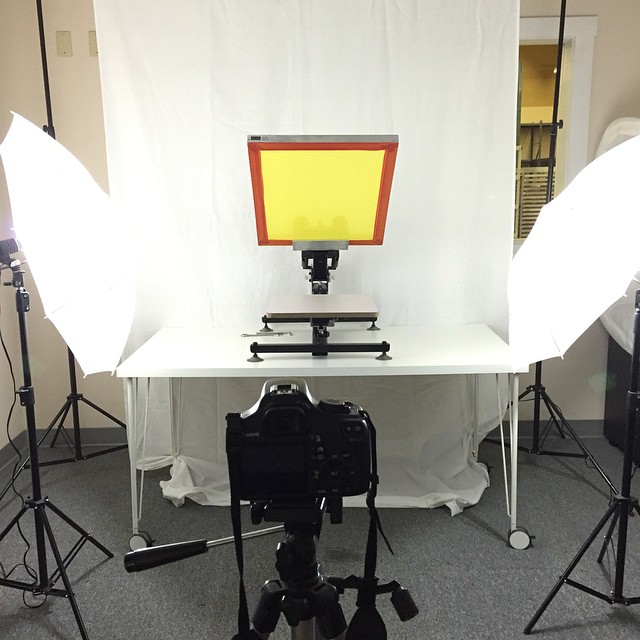
The basic idea behind silk screening is pretty simple and works similar to a stencil. Instead of cutting out shapes individually, you coat a screen in photo emulsion, then cut an image out using a bright light. The video above walks you through the process, but let's go into more detail, starting with the supplies you need.
Set Up a Silk Screen Shop in Your Home
Step 0: Get Your Supplies
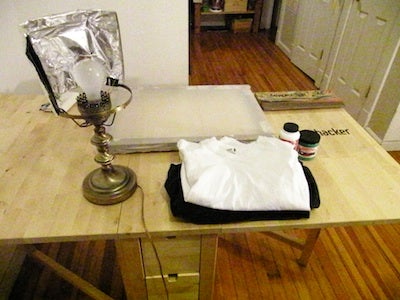
First things first, you need to get your supplies in order. Here's what you need:
- Screen and frame (you can purchase these separately at a local arts store or purchase a frame and screen like this one for $14).
- Photo emulsion and sensitizer ($20).
- A 250 watt bulb ($4)
- Latex gloves.
- A pitch black room (closets work fine).
- A t-shirt.
- Squeegee ($14).
- Silk Screen Fabric Ink ($5).
- Small piece of cardboard (that can fit inside the shirt).
Step 1: Create Your Image

For your first attempt, start with something simple without a lot of thin lines. A standard silhouette using Photoshop is an easy way to go. You need a solid black image because its only real purpose is to block the light. The image you pick will be burnt into the emulsion in step four. Once you settle on an image, print it out on a laser printer onto transparency paper (if you don't want to buy a box of transparencies most copy shops copy onto a transparency for around a dollar).
Step 2: Coat the Screen in Emulsion
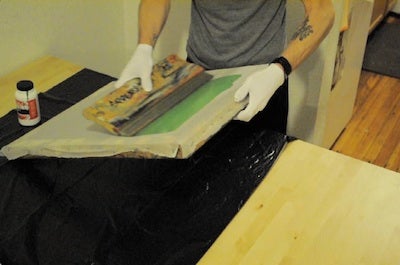
The emulsion comes in two parts: the sensitizer and the emulsion. Mix them together according to the directions on the bottle. Lay down your screen on a garbage bag. Pour a little of the emulsion mixture on the screen and spread it out on the screen with the squeegee. The emulsion should cover a slightly larger area than the image you want to print. If you need to, repeat the process until the screen is coated and you can't see through it. You want a thin, even layer across the whole screen.
Leave the screen in a pitch black room for two hours until it's completely dry.
Step 3: Expose the Image on the Screen
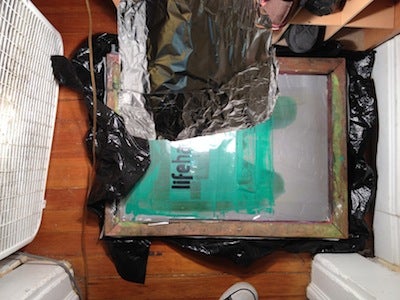
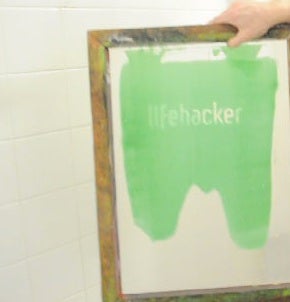
It's time to expose the screen to the light. In that same pitch black room (don't turn on the light yet), lay down a black cloth or board. Lay down the screen and frame with the screen side down on top of the black surface. Then lay the transparency with your image on it on the screen where the photo emulsion is. Tape the transparancy down with scotch tape or lay a piece of glass over it.
Move your lamp so it's about one to two feet above from the screen. Angle a lamp with the 250 watt bulb at the transparency with your image on it and leave the room. A desk lamp works best for this, but if you don't have one, create a reflector out of tin foil and place it above the lamp to reflect the light down. Do not turn on any other lights. Wait for about 10-15 minutes. Return to the room and carefully pull up the transparency. You should see faint blue lines where the image is burned into the screen. If it looks good, it's time to clean it off. If not, leave it a few more minutes and check back. Overexposure will make the image bleed, so be careful.
Step 4: Clean the Screen
Spray your screen down with cold water from a hose, sink, or shower head. Notice how the section where your image is starts to flake off? Continue spraying it until you can see through your image clearly. Hold the screen up to the light to make sure it looks exactly like your transparency. Let the screen dry. Once it's dry, cover any exposed parts of the screen (where there is no photo emulsion or your image) with tape.
Step 5: Print!
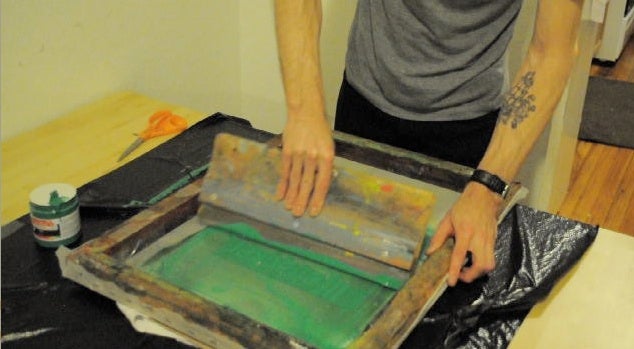
Lay your shirt out on a flat surface. Stuff a square piece of cardboard inside the shirt underneath the area you want to print on. Lay the screen over the shirt with the design where you want to print it.
Pour a small amount of ink horizontally across the top of the screen. Take your squeegee and make one smooth movement down the screen, exerting strong pressure (if this is your first time, it's a good idea to try this on a scrap paper before printing on your shirt). Run the squeegee up, down, left, and right a couple times to push all the ink through onto the shirt.
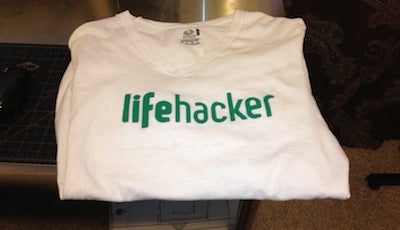
Lift the screen up, pull the cardboard out (carefully), and you're done. If you want to make sure the image sticks on the shirt for a long time, throw the shirt in the oven on 400 degree for about 30 seconds.
Step 6: Clean-up
Screen printing ink dries really quick, so as soon as you're done printing shirts, wash the ink off the screen so you can use it again in the future. If you want to print a completely different image, you can use an emulsion remover like this to wipe the screen clean so you can reuse the fabric and frame.
Screen printing can take a little while to get used to. As you practice you learn the exact timing for exposure, the amount of pressure needed to push the ink through, and other little quirks. Once you get used to how it works, bumping your designs up to two or three colors isn't difficult. While most shops have large machines that handle screen printing, it's just as easy to do in your home as long as you're willing to be patient. Have some tips of your own you'd like to share? Sound off in the comments.
- Log in to post comments